BLOCK BREAKDOWN

Wednesday, March 15, 2017

Dye Day!

If it wasn't bad enough that I took a skip-day last week, this week I took another day off.  You have to realize, when one of your super-talented friends is in your area between teaching events, you jump at the opportunity for a girlfriends dye-day even when you should be prepping for travel next week and have a bazillion things on your list.


I am lucky enough to be friends with Cindy Lohbeck of Hands on Hand Dyes and although she lives clear across the country, we do catch up at various shows throughout the year.

Again this year, I was able to catch up with her before she heads up to Lakeland.  Me and two of the besties jumped at the chance for an impromptu dye day!

Let me mention, if you haven't taken one of her classes, you should!  Cindy brought out all her beautiful samples - I wish I could share them all, but you'll have to settle for just a couple of her fabulous pieces - I would quilt these up in a heartbeat, aren't they gorgeous?!!


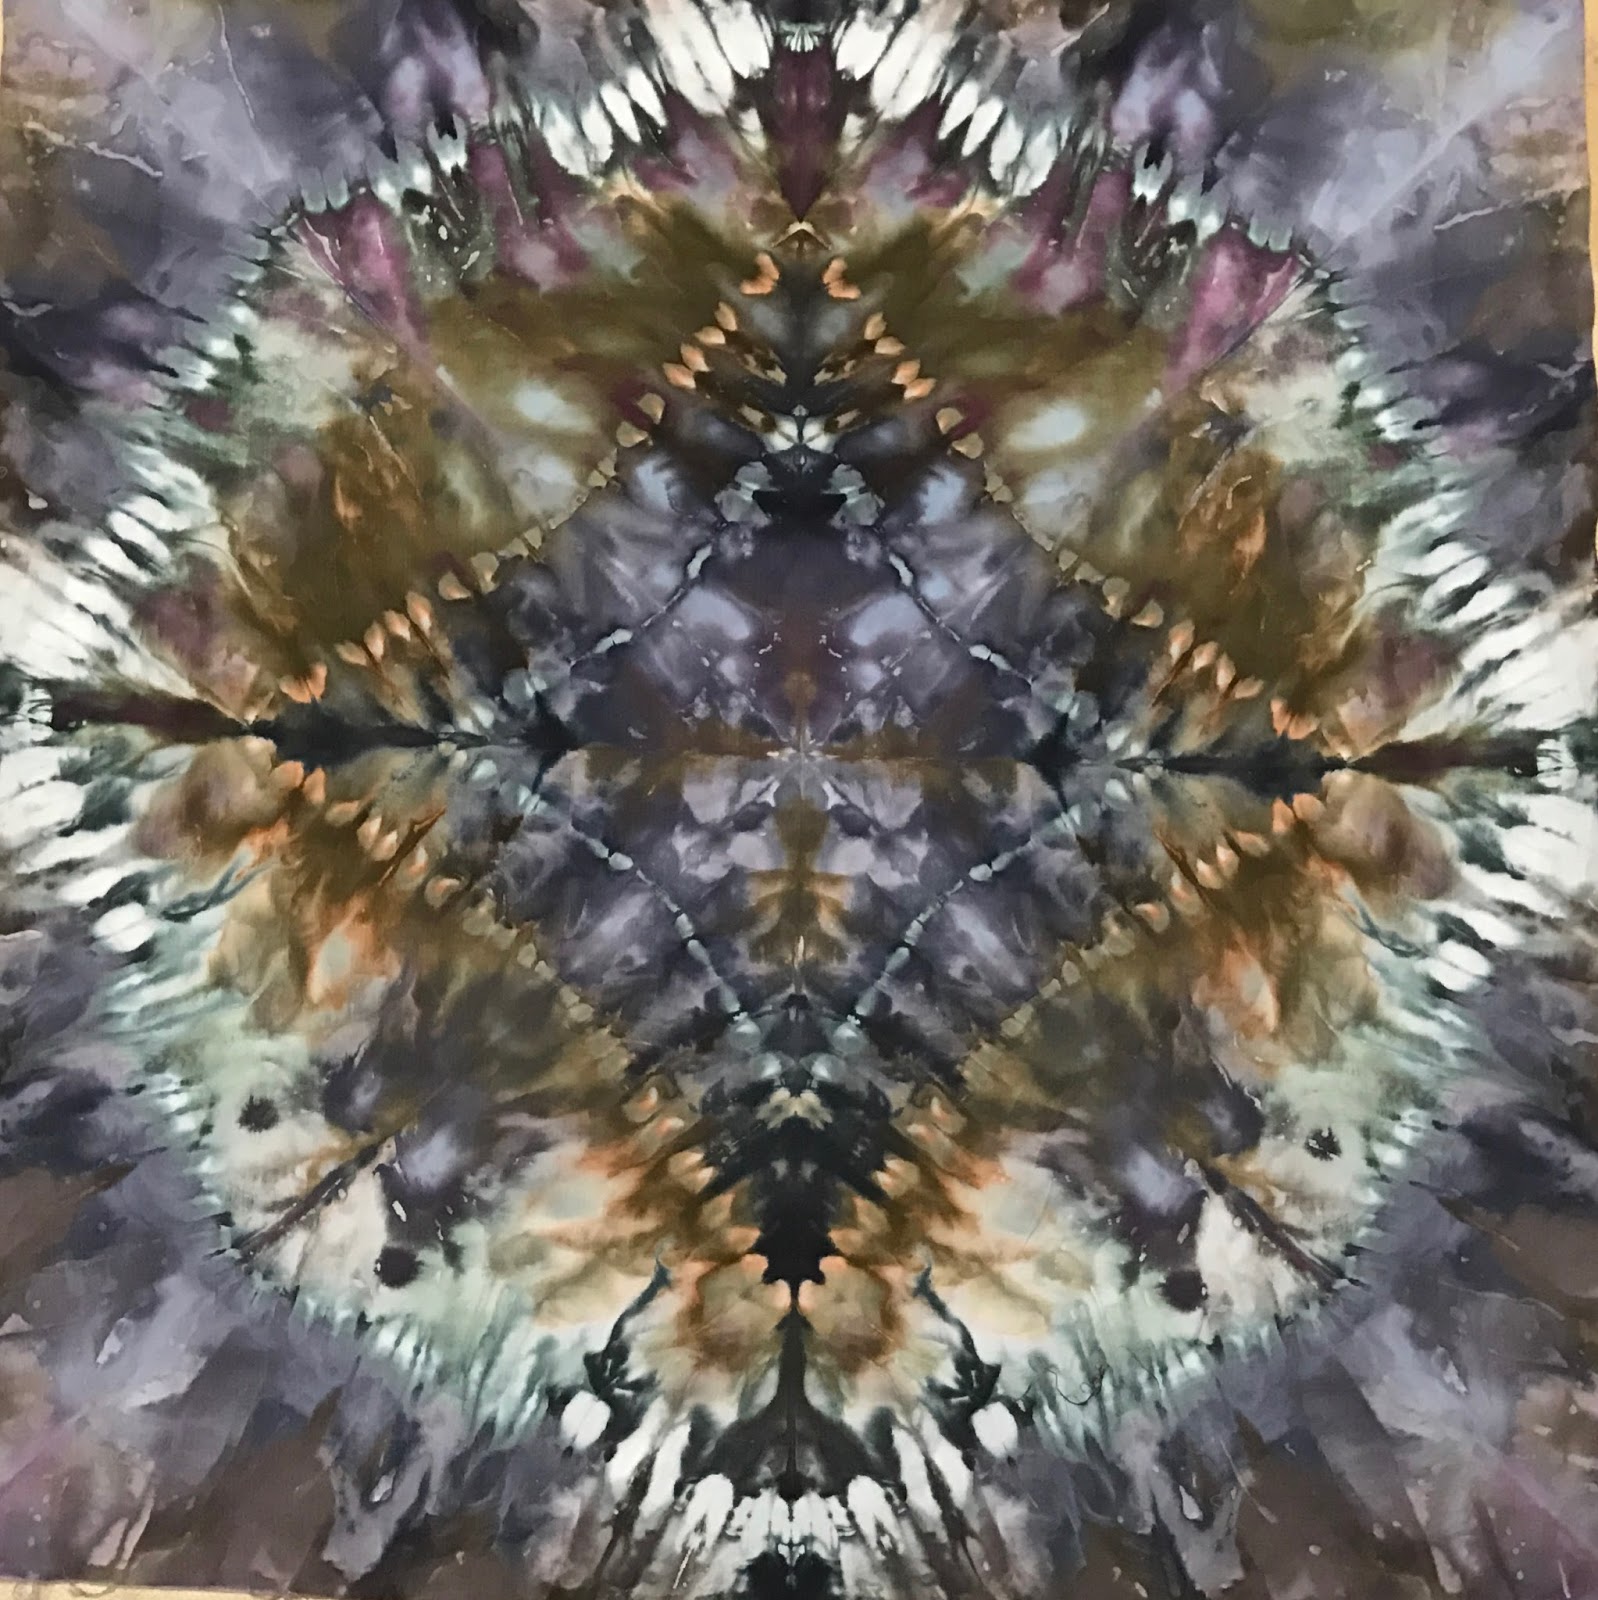
For our girlfriends dye-day we chose to do the mini-mandalas.  Here's just a peek of our fun:


I made a bunch of little origami cranes... that's what they reminded me of and they all went for a swim!


Then came the cool watch and wait part.  I have to add, this is also when we eat lunch, so you know, food!


I used black, charcoal, and khaki.  Hmmmm.... this is the weird part, you have absolutely no idea what is going to happen with these colors.  Really, because during my rinse I was kinda freaking out as everything was blue.  And not just blue, like crazy electric blue... what?  So yes, I did get a little nervous...

Okay, all that stress and freaking out was a waste of time...
These amazing beauties are what I found when I opened the dryer!


I also have to add that I did not wait the total amount of time I was supposed to... blame the ADD.  I now know to add my dye right before I go to sleep - then it will sit the entire time it is supposed to.  I'll just chalk it up to beginners excitement.  I can not wait to do this again!

Wednesday, March 8, 2017

Senior Skip Day...

Remember senior skip days, when you would just blow off all commitments and do nothing, well something, just not school.  Today I had a skip day.  I have a million and one things I should be doing -- class samples, handouts, taxes, paperwork, client work, and more -- but today not one of those things even entered my mind.

I have two bed quilts (not competition) pieced but not finished.  They have been in this pieced-but-not-finished state for far too long.  So I called the bestie and asked if she felt like helping out.  So we set-up shop at the kitchen table and went to town on a quilt for my father-in-law.  He has been waiting patiently since November.


On his quilt I had all the blocks pieced and just needed to figure out the layout, sew the blocks into rows, and then sew the rows together.  With help from Nancy it went super quick!


The pattern is Picture This and can be found in the Happy Hour book by Atkinson Designs.  I love the fabrics in this quilt -- blacks, greys, and beiges.  This quilt measures in at 103x88.

I even managed to piece the backing this evening, as well as load it on the frame!  This batik fabric is perfect!!


It's all basted and ready for me to start quilting it tomorrow.

As if that wasn't enough, we also pieced all the rows together on a king size one too.  You might remember eons ago when I designed this one - if not, click here.  And when I say eons ago, it was August of 2015 that I designed it, I'm not sure when I pieced it but, it has been laying around as rows for quite some time.

So here it is...

This monster measures in at 122x106 -- yes, we are major cover-hogs in this house!

I still need to piece the backing, which will be chunked from the remaining top fabrics.  And probably won't be quilted for a wee bit more.

I'm going to say it was an awesomely productive skip day, which will continue into tomorrow as I finish my father-in-law's much over-due quilt.  I'll post pics once it's finished.

Tuesday, February 21, 2017

ECGS Conference is coming up soon!


This time next month I'll be heading to the East Coast Gammill/Statler Conference.  This will be my third year teaching there and I can't wait -- this is one of my favorite teaching events!

I've heard that there are extremely limited slots left -- if you are on the fence you'd better not wait to think about it... seriously. It is a fantastic venue, lots of food, great people, and you have so many instructors to choose from -- over 20 hours of instruction included!  Classes cover so many topics for both hand-guided as well as Statler.  And the open forums in the evening are great -- you can catch up on something you missed in class or just pick our brains!

Click here for more info, you can also contact Lori or Emily at Threads Run Thru It.  Hope to see you there!

Friday, February 17, 2017

Trenton Makes... progress

I've been working on my bridge quilt in all my spare time [insert really sarcastic tone].  I should say attempting to make time at every possible opportunity - like no down time, no naps, just bridge.  You see, I've missed the first deadline.  It was an early group deadline, and I still have time before it is actually missed, but somewhere in the back of my mind I feel I let the group down - there are also others in the group that aren't finished, but I still feel that way.

If you don't remember the bridge, click here.  The original due date was November, hahaha, that was extended to February.  Yep, and I still didn't make it, see why I feel bad?

Turning edges... millions of them!

Painting neon letters

Spelling words

Trashing manicures

More painting


Trying to figure out how to attach the letters

Well, that worked! 

Placing pieces on the background

Stitching those edges down (miles and miles and miles)

This happened way too many times!

Stitching down the leather pieces and letters were just popping off.

Making the neon edges glow a wee bit more.

Okay, looks pretty good.

Loaded on the Gammill and waiting for me.

Ditching the edges with black (what was I thinking -- do you know how many edges there are?)

So in the last bridge post, you'll remember I said sometimes quilts go through a period of dislike?  Yeah, I'm there.  So there.  My heart isn't in this project anymore.  I'm not sure what happened, or exactly when it happened, but I'm just not *feeling it* anymore.  I'm still going to finish it, I've just become emotionally separated from it.  And yes, I'm still hoping that during the quilting process *it* comes back - I truly want to feel strongly about every quilt I make, I don't want to just produce them, I want to create them.  I hope that makes sense.

So, the next time you see this quilt, it'll be finished - and fingers crossed I love it again!

Wednesday, December 21, 2016

Ogee Rulers!!

I am beyond excited about my newest ruler - the OGEE!  They are currently available for PREORDER -- I'm hoping to have them in my hands for shipment mid-end January.  But, if you'd like to be one of the first to receive them, you might want to pre-order.  Here's a link to my website store, just scroll down until you see them.

As with everything, there is a story... here is the prototype photo:

The prototypes were designed based on my drawings.  Well... me being a lefty and all, I do many things from the right and don't even realize.  The actual rulers will be the reverse of what's in the photo -- you know, with 90% of the world doing things from the left my prototypes would be a little difficult.  Well, not really, as you flip the ruler around when you're using it, but having them aesthetically pleasing is kinda important to me.

So here are just a few of the awesome things possible:


Even as I'm typing this I'm thinking of even more ways to use this ruler!  

Oh, the details... I almost forgot!  The 2" is $15, the 4" is $22, and the 6" in $30 -- or you can buy the set of three for $60 and save!  So if you're interested, go ahead and follow the store link and place your preorder.  You'll get an email notification as soon as they are available (mid-end January).  I can't wait to see what all you amazing peeps can do with them!

Thursday, September 29, 2016

Secret Project Reveal!

If you follow along on Facebook you might recall reading bits about a super-secret project between Jodi Robinson and myself.  It had everyone very curious... people wanted to know why Jodi was sending a quilt to me for quilting - they couldn't figure out what we were up to!

It was only kept secret because it was a surprise for Shandi at Gammill -- she was expecting.  I say was, because her beautiful baby girl is here already!  Anyway, we created a beautiful baby quilt for Shandi.  Jodi did the design and piecing and I did the quilting and binding.  I'm so glad Jodi agreed to the piecing part -- if I were piecing it, we'd all still be waiting - seriously!  The pattern is from the book Applique for Modern Beginners - which Jodi just happened to co-author along with Eva Birch and Nancy Gano.  For all those interested, here is a link to the book on Jodi's blog:  https://jrdesigns.wordpress.com/applique-for-modern-beginners-book/  I haven't yet seen the book but, knowing two of these three I'm sure it is awesome!

I must admit, the quilt has been finished for a little while now - well, except for the attachment of the label, I almost forgot about it!  Back at the end of August Jodi and I were supposed to have a quick trip to Gammill HQ (aka the mothership) which also happened to be the time Shandi was heading out for her maternity leave and we really wanted to hand deliver the quilt to her.  With multiple scheduling conflicts our visit has been postponed so we had to ship the quilt off -- bummer, right?

But we didn't miss out - here's a little tidbit I grabbed from Shandi's Facebook page:


I think Marat looks quite pleased with her new quilt!

Tuesday, September 27, 2016

Big City Brights!

Holy stitches I've finished a quilt for me!
Okay, I should rephrase and say I've quilted a quilt for me!  My bestie, Natalie, actually pieced the quilt top.  A few months back I rescued it from her never-gonna-get-quilted UFO pile.  I loved all the colors and the illusion of tall city buildings...hence the name, Big City Brights!  Regarding the pattern name... well, it was awhile ago and Natalie can't quite remember.  She does remember it was in a magazine - I know, not much help, right?  It is essentially a square in a square and two rectangles.  The color placement is what creates the illusion.

So, even though I managed to save it from Natalie's pile, it sat here in a new pile.  Not because I didn't want to quilt it, I did, very much so.  My pile was due to lack of time -- btw, someone really needs to work on that, creating more time!  Fast forward a wee bit, Janet-Lee (of MQX fame) posted that there was a need for edge-to-edge quilts at MQX Midwest.  Knowing I had this awesome quilt top just sitting there waiting for stitching I thought I could certainly help out.  So I squeezed (and boy do I mean squeezed) this throw-size quilt into my schedule.  It's stitched in my usual eclectic-whatever-comes-out-of-the-needle style and I absolutely love it!  It will be at MQX Midwest, and I doubt it will ribbon - it wasn't planned as a competition piece at all -- but, I hope others like it as well.

Here's a pic of the finished quilt as well as a detail pic:

Wednesday, August 17, 2016

For ME Friday - Screen Prints

I realize this is late but, last week I took another For Me Friday but this time, it was for my Journeys Thru Art group meeting.  It was a project update - all of the bridges are coming along nicely, except mine.  Well, that's another story, for another day - let's just say I'm having a do-over (more to follow on that).

So, on to the other part of the meeting. We used Deb's Thermofax machine for screen prints. What a fun project!  I took three of my doodles and scanned them so I could print them on the laser - you need a carbon based toner for the Thermofax to work:

Then we placed the doodles under the special screen (I don't know what it's called) and put them through the Thermofax machine.  Here's Deb & Marian:


Tape up the sides to ease with paint and removal.  Add some of this:


Grasp firmly and pull the squeegee at a 45-degree angle:

And, magically get this:

Here they are drying: 

It was an awesome day. Oh, and I can't wait to see how all these bridges progress. They are going to be awesome.

Saturday, August 6, 2016

For ME Friday: Trenton Makes

I always try to take Friday's to work on my own projects.  I have to, if not, I would never get a chance to work on my own stuff.  As much as I love stitching on client quilts, I also love creating my own pieces (although sometimes I get to a spot of dislike).

So today I worked on my bridge project as it is due in November.  My Journeys Thru Art challenge for this year is bridges.  I am doing the Trenton Makes Bridge - also known as the Lower Trenton Bridge as well as the Warren Street Bridge.  It is a truss bridge that crosses the Delaware River between Trenton, NJ and Morrisville, PA.  Why did I choose it?  It's a part of me, my history - you all know I'm originally from Trenton, NJ right, besides, it is a really cool bridge (especially at night when the words are lit).

So awhile back I had asked my good friend's brother (a pro-photographer) to get a fantastic pic of the bridge for me -- since I'm way down here in SoFlo.  There are a million photos on the internet but I wanted something special and also didn't want to deal with tracking down sources and rights and attempting to obtain permissions (and yes, I do have Robert's permission for use).  Here's the photo that Robert took:
Photo credit: Robert Bruschini Images, LLC
It is an awesome photo but, it comes with a story...
Robert and his wife wanted to get the sunrise behind this bridge.  So they woke up super early to get over to the PA side of the bridge to get the sun rising on the NJ side.  It was awesome, right?  BUT... did you know that they shut down the neon letters in the wee hours of the morning?  Nope, neither did they, so Robert did a little photoshopping to add the neon back into the awesome pic.

It is truly an awesome photo but, I needed to crop it down to be more bridge less scene to keep with the guidelines of our challenge.  So here is the cropped version:
Photo credit: Robert Bruschini Images, LLC
I still wanted to keep those intense blues in the first picture, so I commissioned Cindy Lohbeck of Hands on Hand Dyes to dye up awesome fabrics.  And she did!  She dyed up a few samples and sent me a bundle of goodies to choose from -- hahaha, choose, I wanted them all - just look at them!

Only two made it into the bridge project, but I will definitely find a use for all the others!  So here is the sky (sapphire blue) and the water (sapphire blue & black - Arashi shibori).  I had to piece the water on the diagonal to get the ripples going the right direction.  The background is much wider than my design board, which is why there is so much drape on the side -- the master copy I'm working from is about 65x36.  And, of course, the lighting isn't perfect (it was late):

So then came the steel work.  Hmm... all I can say is it was frustrating.  The master copy is black and white and trying to find the lines within the pattern was confusing and difficult.  I finally realized that it would have to be constructed in two layers.  Once I figured that out, the rest was just a lot of tracing to get my pattern pieces:

So that's where I'm at -- today I'll finish cutting out the pattern pieces and decide on a bridge structure fabric.  The bridge is that weird green, what I call Statue-of-Liberty green, but at night and with the glow of the lights and neon it turns into an even stranger golden-green-grey -- yeah, I'm sure I'll find fabric like that, or... paint!

So happy Saturday quilty peeps - hope your weekend is wonderful!